
- September 6th, 2023, 2:06 pm#4985652
hello
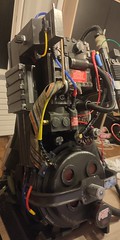
as i said in my introduction i'm modding my haslab proton pack.
sorry it's a pics heavy post...
@ the beginning, I only wish to add some real tape on the false one, and other simple modds.. but finally i began to change more and more things.
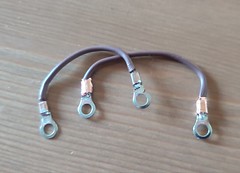
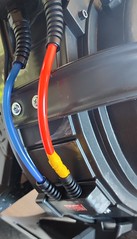
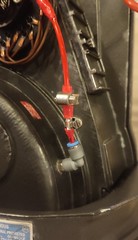
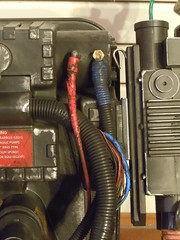
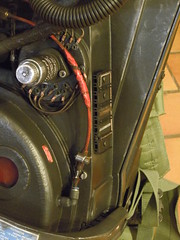
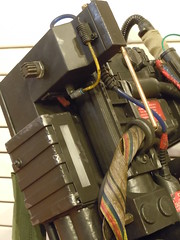
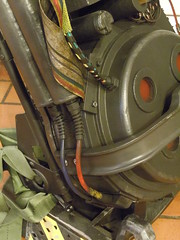
I have changed all the tubes and cable to real ones, also the cable holders, the pneumatic and hydraulic connectors...
each time i tried to make it simple but i had to take the proton pack apart almost every time lol.
I have started three months ago.
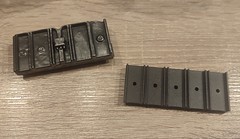
first thing was to change the big cable holder for a real one

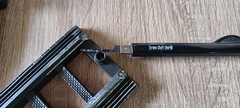
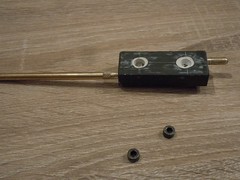
Then change the big hose tube and make a rotation point so it can be easier to handle.
I've bought a more flexible hose but it's less accurate then i took the plug on the wand side apart.
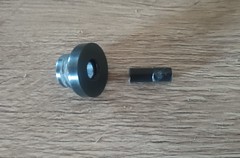
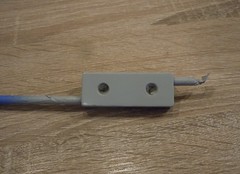
it wans quite easy in fact.. changed the inner tube for a steel one and i've made a ring so the part holding the hose will spinn around it everything is held in place with epoxy glue


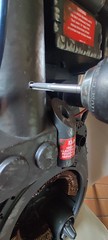
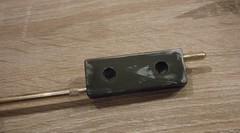
I tried to make the same change on the other plug but i failed.
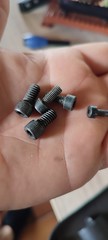
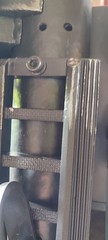
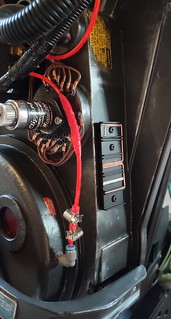
then changed the screws on the ladder


after that i have decided to change the rubber cables .. so i took them away, fill the gap with putty.. sanded and repainted (nato black from tamiya) with a semi gloss varnish , then a matt one and weathering using "zebracier" a sort of rub and buff paste.


Then I changed the false gaffer tape on the wand...
well as you know there is a large cap.. so printed a part found on the web..adjust it to reduce the step between the piece and the handle of the wand.. glue it with epoxy, then cover it with a military camo tape (olive Drab)


Then the tubes/cables and cable holders, etc...


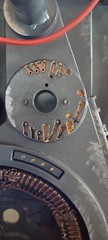
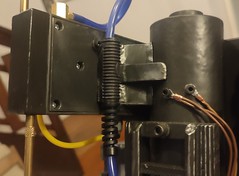
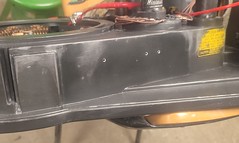
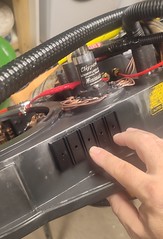
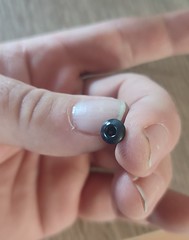
I also add real dale resistors (still have to cover the holes on the ion arm )
)
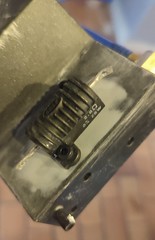


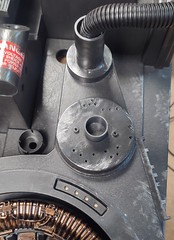
juste receive a heatsink .. then... fill the holes, primer, paint and weathering.. i'm wainting for the right screws.


I also add a "keep alive" board from frutto
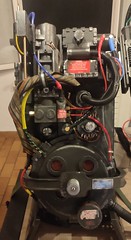
that's where i am today .. hard to resume three monthes of work ..

still have to make a real weathring job on it and i can say it'll be finished then
EDIT : resources
for the collored tubes : gbfans shop
for the dale resistors : gbfans shop
for the cable hoses : non split cable loom 12 and 20 mm OD for the pack, found them on amazon
for the hydraulic connectors : GBfans shop for the elbow, local shop for the straight ones.
for the pneumatic connectors : sourcing map elbow 4mm OD / 1/8PT connectors on amazon
mili camo tape : mil-tec camo tape olivre drab on amazon
spiraled cable holders: PG7 cable holders on amazon.
Yellow hose: GBfans shop
black tube : 10mm OD fuel hose on amazon
Cable hose between the wand and the Pack : spiraled tube for garden/pond 19mm OD on amazon (not accurate but really more flexible)
as i said in my introduction i'm modding my haslab proton pack.
sorry it's a pics heavy post...
@ the beginning, I only wish to add some real tape on the false one, and other simple modds.. but finally i began to change more and more things.
I have changed all the tubes and cable to real ones, also the cable holders, the pneumatic and hydraulic connectors...
each time i tried to make it simple but i had to take the proton pack apart almost every time lol.
I have started three months ago.
first thing was to change the big cable holder for a real one
Then change the big hose tube and make a rotation point so it can be easier to handle.
I've bought a more flexible hose but it's less accurate then i took the plug on the wand side apart.
it wans quite easy in fact.. changed the inner tube for a steel one and i've made a ring so the part holding the hose will spinn around it everything is held in place with epoxy glue
I tried to make the same change on the other plug but i failed.
then changed the screws on the ladder
after that i have decided to change the rubber cables .. so i took them away, fill the gap with putty.. sanded and repainted (nato black from tamiya) with a semi gloss varnish , then a matt one and weathering using "zebracier" a sort of rub and buff paste.
Then I changed the false gaffer tape on the wand...
well as you know there is a large cap.. so printed a part found on the web..adjust it to reduce the step between the piece and the handle of the wand.. glue it with epoxy, then cover it with a military camo tape (olive Drab)
Then the tubes/cables and cable holders, etc...
I also add real dale resistors (still have to cover the holes on the ion arm
juste receive a heatsink .. then... fill the holes, primer, paint and weathering.. i'm wainting for the right screws.
I also add a "keep alive" board from frutto
that's where i am today .. hard to resume three monthes of work ..
still have to make a real weathring job on it and i can say it'll be finished then
EDIT : resources
for the collored tubes : gbfans shop
for the dale resistors : gbfans shop
for the cable hoses : non split cable loom 12 and 20 mm OD for the pack, found them on amazon
for the hydraulic connectors : GBfans shop for the elbow, local shop for the straight ones.
for the pneumatic connectors : sourcing map elbow 4mm OD / 1/8PT connectors on amazon
mili camo tape : mil-tec camo tape olivre drab on amazon
spiraled cable holders: PG7 cable holders on amazon.
Yellow hose: GBfans shop
black tube : 10mm OD fuel hose on amazon
Cable hose between the wand and the Pack : spiraled tube for garden/pond 19mm OD on amazon (not accurate but really more flexible)


 - By mrmichaelt
 - By zeta otaku
 - By Indy Magnoli
 - By Gatchigirl